 BIS Certification
 CDSCO
 PESO
 CPCB
 LMPC
 WPC Approval
 Global Approvals
 TEC
 ARAI
 BEE
 ISO Certification
 DGCA Certification
 NOC For Steel
 APEDA Registration






















 Business Registration
 FSSAI Mark Certification












 (32).jpg)
 Legal Services
 Trademark Registration
 Copyright Registration
 Patent Registration
 By
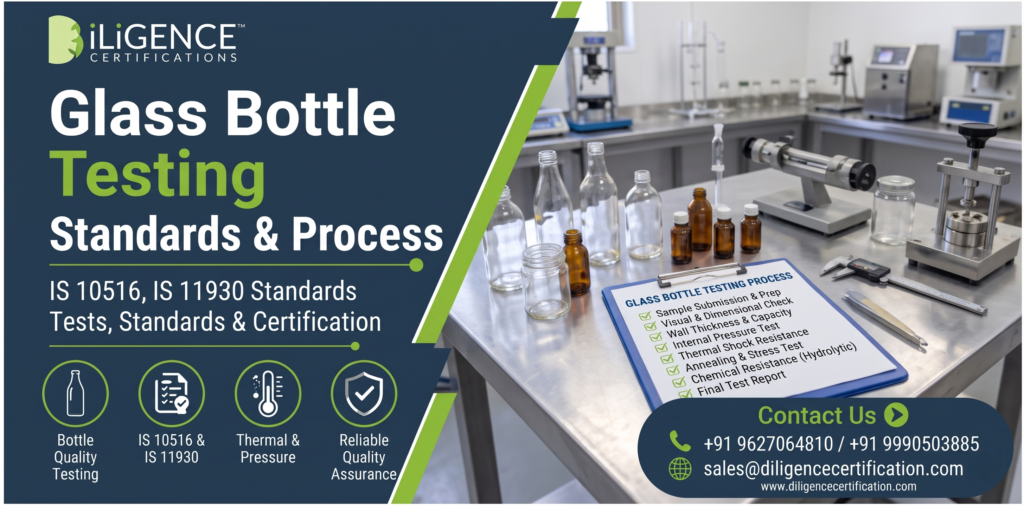
- Glass bottle testing checks if a bottle is strong, safe, correctly sized and fit to hold your product.
- Main tests cover dimensions, capacity, wall thickness, pressure, thermal shock, impact, annealing and chemical resistance.
- Indian Standards (IS) from BIS give test methods, and many are based on ISO methods.
- Which rules apply depends on what goes inside the bottle, like drinks, medicine, food or chemicals.
- Testing both at your own factory lab and at an outside recognised lab saves a lot of trouble later.
- Most failures come from simple things like uneven wall thickness and poor annealing, and these can be fixed early.
Introduction
Think about a cold drink bottle. It sits in a hot truck in May, goes into a freezer in June, gets dropped from a shelf, and still has to hold the gas inside. If even one bottle in the batch bursts, the brand loses trust. Nobody blames the glass. They blame the company.
That is exactly why glass bottle testing matters. It is a set of simple checks done in a lab to confirm that your bottle can handle real life: heat, cold, pressure, bumps and the product itself.
In this blog, we will explain glass bottle testing in plain language. You will learn what it is, which standards are used, what tests are done, how the process works, and what mistakes to avoid. Whether you make bottles, buy them or fill them, this guide is for you.
What Is Glass Bottle Testing?
Glass bottle testing means checking a glass bottle against set requirements using standard test methods. A lab takes sample bottles from your batch and runs different tests on them. Then it gives a report that says whether the bottle meets the requirement or not.
The tests look at three big things:
- Physical quality: size, weight, wall thickness, shape, neck finish, and any visible defects.
- Strength: how much pressure, heat change, impact and load the bottle can take.
- Chemical quality: whether the glass reacts with the liquid inside and releases anything into it.
Simple example. A juice company orders one lakh bottles. Before the full lot is accepted, a few bottles are tested. If the samples pass, the lot moves ahead. If they fail, the supplier has to fix the problem first. That small check saves the company from a very costly recall.
Why Is Glass Bottle Testing Important?
Glass looks strong, but it is also brittle. A tiny hidden flaw can turn into a crack. Testing finds that flaw before it reaches the customer.
Here is why it matters:
- Safety: A bursting bottle can injure workers and customers.
- Product protection: Poor glass can change taste, colour or quality of the product. For medicines, this is a serious matter.
- Fewer breakages: Good bottles survive filling lines, transport and shelves.
- Brand name: Customers remember a bad bottle for a long time.
- Compliance: Many buyers, export markets and sector rules ask for test reports.
- Cost saving: Finding a problem in a sample is far cheaper than finding it in a full truck.
Which Standards Are Used for Glass Bottle Testing in India?
In India, the Bureau of Indian Standards (BIS) publishes standards for glass containers. Many of them are aligned with ISO methods. The exact standard you need depends on your bottle type and what goes inside it.
Here are some commonly referred ones. Please always check the latest version on the BIS website before testing, because standards get reviewed and revised.
| Standard | What it covers | In simple words |
|---|---|---|
| IS 6654 | Glass containers glossary of terms | Explains the technical words used in glass bottle standards |
| IS 10516 | Internal pressure resistance of glass containers | How much pressure from inside the bottle can take |
| IS 11930 | Thermal shock resistance and thermal shock endurance | How the bottle handles sudden hot and cold change |
| IS 2303 (Part 1/Sec 1) | Hydrolytic resistance of glass grains at 98 degree C | How much the glass reacts with water |
| IS 1108 | Pharmaceutical glass containers | Requirements for bottles used for medicines |
| IS 19085 | Glass containers for homoeopathic pharmaceutical preparations | Requirements for phials, drop bottles and screw-neck bottles for homoeopathy |
| IS 10106 (Part 4, Sec 4) | Packaging code for glass containers | Guidance on packing glass containers safely |
There are also product-specific standards, for example for multi-trip beer bottles and for bottles used for free flowing liquids. Which one applies to you depends on what you make.
A small but important point. Not every glass bottle falls under compulsory BIS certification. Some product categories do, and some do not. For example, for packaged drinking water, BIS guidance has noted that there was no Indian Standard for glass bottles at that time, so such containers were not separately tested under that scheme. Rules change from time to time, so always confirm the current position for your product before you plan.
Different Bottles, Different Needs
One glass bottle test plan does not fit all. A beer bottle and a medicine phial are very different.
| Bottle type | What matters most |
|---|---|
| Beverage and soft drink bottles | Internal pressure, thermal shock, impact, capacity |
| Beer bottles (multi-trip) | Strength after repeated use, pressure, wear on the surface |
| Pharmaceutical bottles | Chemical resistance, clean glass, closure fit |
| Homoeopathic phials and drop bottles | Chemical resistance, neck finish, dropper fit |
| Food jars and sauce bottles | Thermal shock (hot filling), capacity, closure fit |
| Perfume and cosmetic bottles | Appearance, wall thickness, neck finish, leak check |
| Laboratory bottles | Thermal and chemical resistance, repeated sterilisation |
So before you ask for testing, first be clear about your product, filling method and market.
What Tests Are Done in Glass Bottle Testing?
Let us go through the common tests one by one. We will keep it simple.
1. Visual and Appearance Check
The lab looks at each bottle for defects. Common ones are cracks, bubbles (called seeds or blisters), stones, scratches, chips on the rim and uneven surface. Some defects are small, but some are critical. A chip on the neck, for example, can cut a customer or break the seal.
2. Dimension Check
The lab measures height, outer diameter, neck size and finish, and how straight the bottle stands. If the neck finish is slightly off, the cap will not seal well and the product may leak. If the bottle is not straight, it can jam or fall on a filling line.
3. Capacity Test
This checks how much liquid the bottle can hold. In the brimful capacity method, the bottle is filled to the top and the liquid is weighed to calculate volume. Capacity matters because customers must get what the label says.
4. Weight and Wall Thickness
Bottle weight is checked against the design. Wall thickness is measured at different points, like the shoulder, body and base. If the glass is thin at one spot, that spot becomes the weak point. Even thickness spreads stress evenly.
5. Internal Pressure Resistance Test
This is very important for fizzy drinks and beer. The bottle is filled with water and pressure is slowly increased from inside until it reaches the required level or the bottle breaks. It tells you whether the bottle can safely hold gas pressure.
6. Thermal Shock Test
Here the bottle is dipped in hot water and then quickly moved into cold water, or the other way round, with a set temperature difference. Glass expands and shrinks with heat. If it cannot handle the sudden change, it cracks. This matters a lot for hot-fill products and for bottles that go through washing and pasteurising.
7. Impact Resistance Test
A small pendulum hammer hits the bottle at a defined point. This copies the knocks a bottle gets in the filling line, in crates and in transport. Weak bottles break at lower impact.
8. Vertical Load Test
The bottle is pressed from the top, with a closure in place, to see how much load it can take. This matters when pallets are stacked high in a warehouse. If bottles crush at the bottom of the stack, the loss can be huge.
9. Annealing or Stress Test
After glass is shaped, it is cooled slowly in a special oven called an annealing lehr. If the cooling is done badly, hidden stress stays inside the bottle. A polariscope (a simple optical device) shows this stress as coloured patterns. Bottles with high stress can break on their own, sometimes even on the shelf.
10. Chemical Resistance Test
Glass is not completely inert. Small amounts of alkali can come out of the glass into the liquid. The hydrolytic resistance test crushes glass into grains, exposes them to hot water, and then measures how much alkali is released. This is especially important for medicine and sensitive products. It also helps put the glass into the correct class.
11. Closure and Leak Check
The cap and bottle must work as a pair. The lab checks fit, torque and leak tightness. A perfect bottle with a poor cap is still a failure.
12. Marking and Labelling Check
Finally, the lab checks any embossing, marking and basic information required by the standard or by the buyer.
Quick Summary of Tests in Simple Words
| Test | What the lab checks | In simple words |
|---|---|---|
| Visual | Cracks, bubbles, chips | Does it look clean and safe? |
| Dimensions | Height, neck, finish | Does the cap fit and does it stand straight? |
| Capacity | Volume held | Is the quantity right? |
| Wall thickness | Glass thickness at points | Is there any weak spot? |
| Internal pressure | Pressure from inside | Will it burst with gas? |
| Thermal shock | Hot and cold change | Will it crack in heat or washing? |
| Impact | Hit from outside | Will it survive a knock? |
| Vertical load | Top load | Will it hold in a stacked pallet? |
| Annealing | Hidden stress | Is it cooled properly? |
| Chemical resistance | Alkali release | Will it affect the product? |
Two Kinds of Testing: Factory Lab and Recognised Lab
Good companies do both. They support each other.
Factory lab (in-house testing): Done every shift or every batch. It is quick and low cost. It catches problems while production is running. Typical checks are weight, dimensions, wall thickness, annealing and visual checks.
Outside lab (third-party testing): Done in an independent laboratory with calibrated equipment. This gives a formal report that buyers, auditors and authorities trust. Pressure, thermal shock, chemical resistance and full compliance testing are often done here. If your product falls under a BIS scheme, you would need a BIS recognised laboratory.
Think of it like this. The factory lab is your daily health check. The outside lab is the doctor’s full report.
Step-by-Step Glass Bottle Testing Process
The process is simple if you plan it well.
- Identify your product and market. Be clear about what goes inside the bottle and where it will be sold.
- Find the applicable standard. Check the BIS standard, any buyer specification, and any sector rule such as pharma or food rules.
- Finalise the test plan. Decide which tests you need, based on the standard and the bottle type.
- Choose the lab. Pick a lab that has the right equipment and scope for these tests.
- Prepare samples. Take samples from a normal production lot, not hand-picked good pieces. Label each one clearly.
- Send samples with details. Share bottle drawings, capacity, glass colour, closure type and intended use.
- Testing is done. The lab runs each test as per the method and records results.
- Receive the report. The report shows each result against the requirement, with a pass or fail.
- Act on the result. If it passes, keep the report safe. If it fails, find the root cause, fix the process and retest.
Documents Usually Needed
Company documents
- Company name and address
- Contact person details
- Manufacturing unit details
Product documents
- Bottle drawing or specification sheet
- Glass type and colour
- Capacity and weight details
- Closure details
- Intended product and use
Testing records
- Earlier test reports, if any
- In-house inspection records
- Batch or lot number
If anything is missing, the lab may ask you again, and this delays the work.
How Long Does Glass Bottle Testing Take?
There is no fixed time. A basic check of dimensions and weight can take a short time. Tests like thermal shock, pressure and chemical resistance take longer, and the lab queue also matters. If a retest is needed, it adds more time. So always ask the lab for a timeline when you submit the samples, and plan your production around it.
What Decides the Cost of Glass Bottle Testing?
We are not giving any amounts here, because the cost changes from lab to lab. But these things decide it:
- Number of tests selected
- Number of samples
- Type of bottle and its size
- Whether the lab is general or specially recognised
- Whether you need a fast report
- Whether retesting is needed
Tip: ask the lab for a clear test-wise quote before you start. It avoids surprises.
Common Failures and Easy Fixes
| Problem | Likely reason | Easy fix |
|---|---|---|
| Bottle bursts in pressure test | Thin wall at shoulder or heel | Correct glass distribution in the mould |
| Cracks in thermal shock | Poor annealing or uneven thickness | Fix lehr temperature and thickness |
| High stress in polariscope | Cooling too fast | Adjust the annealing cycle |
| Cap leaks | Neck finish out of size | Check mould and finish gauge |
| Capacity out of range | Mould or fill point error | Recheck mould dimensions |
| Chemical test fails | Wrong glass composition or poor surface treatment | Review raw material and surface treatment |
| Chips on rim | Rough handling or line contact | Improve line guides and packing |
Common Mistakes to Avoid
- Sending only the best-looking bottles as samples.
- Using an old version of the standard.
- Skipping in-house testing and depending only on the outside lab.
- Not sharing the intended use with the lab.
- Ignoring annealing because the bottle looks fine.
- Testing the bottle without the actual closure.
- Not keeping batch-wise records.
- Assuming one test report is valid for every bottle design forever.
The last one is important. If you change the mould, glass weight or shape in a big way, the old report may not be enough.
Who Needs Glass Bottle Testing?
- Glass bottle manufacturers who want steady quality and fewer rejections.
- Beverage and beer companies who need pressure-safe bottles.
- Pharma and homoeopathy companies who need chemically safe containers.
- Food and sauce brands who fill hot and need thermal strength.
- Cosmetic and perfume brands who care about look, finish and leak safety.
- Importers and traders who buy bottles and need proof of quality.
- Exporters whose overseas buyers ask for test reports.
- Private label brands who get bottles made by someone else but carry the responsibility.
Why Choose Diligence Certifications for Glass Bottle Testing Certification?
Getting the right test plan, the right lab and the right paperwork can feel confusing. This is where Diligence Certifications can help.
Here is how the team supports you:
- Helps you understand which standard and rules apply to your bottle type.
- Guides you on the right test list so you do not test too little or too much.
- Helps you prepare samples and documents properly.
- Coordinates the process with the testing lab.
- Helps you read the report and understand what to fix if something fails.
- Supports you with the related compliance steps for your product.
You can learn more about the support on the service page. Please note that final results always depend on the actual test outcome and the current rules, and no one can promise a particular result in advance.
After Testing: What to Do Next
Testing is not a one-time task. Here is what good companies do after the report:
- Keep the report safe and easy to find for audits and buyers.
- Keep checking a few bottles from each batch in your own lab.
- Re-test when you change the mould, glass formula, weight or supplier.
- Track complaints and breakages from the market and match them with test data.
- Review standards from time to time, because versions get updated.
Tips to Pass in the First Attempt
- Read the standard fully before production starts.
- Make sure moulds are checked before a full run.
- Control wall thickness at every shift.
- Keep the annealing lehr well maintained.
- Test a small trial lot in your own lab first.
- Send samples from a normal lot with proper labels.
- Share the right details with the lab.
- Fix small issues early, before they become big failures.
Quick Checklist Before Sending Samples
- Correct standard and version identified
- Sample quantity confirmed with the lab
- Samples picked from a normal production lot
- Each sample labelled with batch number
- Closures included
- Bottle drawing or specification attached
- Intended product and use mentioned
- In-house results checked once
- Contact person details shared
Conclusion
Glass bottle testing is not just paperwork. It is how you protect your customers, your product and your brand. A good test plan checks size, strength, heat handling and chemical safety, so there are no surprises after the bottles reach the market.
Start with the basics. Know your product, find the right standard, test in your factory lab daily, and use a proper outside lab for formal reports. Keep records, fix problems early, and re-test when anything changes.
If you want help with planning the tests or understanding the rules for your bottle, reach out to the team at Diligence Certifications and take the first step.
Frequently Asked Questions
1. What is glass bottle testing?
It is the process of checking a glass bottle for size, strength, heat handling and chemical safety using standard test methods in a lab.
2. Why is glass bottle testing needed?
It protects customers from injury, protects the product inside, reduces breakages and helps you meet buyer and sector requirements.
3. Which standards are used for glass bottle testing in India?
BIS publishes many standards for glass containers, such as those for pressure resistance, thermal shock, hydrolytic resistance and pharmaceutical bottles. The right one depends on your bottle type and product. Always check the latest version.
4. Is BIS certification compulsory for every glass bottle?
Not always. It depends on the product category and the rules in force at that time. Please confirm the current position for your product before planning.
5. What is the internal pressure test?
The bottle is filled with water and the pressure inside is raised to see if it can safely hold gas pressure, as in fizzy drinks and beer.
. What is a thermal shock test?
The bottle is moved quickly between hot and cold water to see if it cracks. It shows how well the glass handles sudden temperature change.
7. What is annealing and why does it matter?
Annealing is slow cooling of the glass after shaping. If it is done wrongly, hidden stress remains and the bottle can break on its own later.